My blog has moved!

You should be automatically redirected in 6 seconds. If not, visit
http://viaviands.com
and update your bookmarks.

Friday, February 26, 2010

Pleasing the Persnickity Pup


Lest you think that we eat tons of good food around here while Merry has to make do with kibble, let me assure you - he eats pretty well.

In fact, Mr. Picky has been known to drive his mom crazy by rejecting even carefully-crafted meals.

Cori mixes a wide variety of scraps and dollops of different food with Merry's kibble and wet food to try to entice him to eat.

Sometimes, we get this response.


Other times, we get this one.

What, no prosciutto? Le sigh.

Canine Haute Cuisine
Serves one picky puppy

1 scoop Iams Low Residue Kibble
1/2 can Iams Low Residue Canned Food
1/2 cup add-ins (His favorites are cheese, cream cheese, peanut butter, Greek yogurt, steak, shrimp, or leftover wiener schnitzel. Prosciutto is also acceptable.)

Mix together. Serve. Hope he eats it.

Thursday, February 25, 2010

Farmer's Market Chowder


Last weekend, Cary and I went to a nearby Farmer's Market.

During a gentle drizzle, we strolled between stands selling bright yellow flowers, dark green vegetables, and various forms of ethnic street food.

We picked up one of these.


A few of these.


And these beauties.


I simmered them all together with a few other veggies and some chicken to make this:


Or, with fresh bread, pretty much a perfect Saturday dinner.

Farmer's Market Chowder
Inspired by this sweet corn chowder, which is one of my favorite soups as-is

The beauty of this soup is how easy it is to adapt to whatever's in season wherever you are. Just head out to your local farmer's market or vegetable stand and pick out whatever looks prettiest, tastiest, or otherwise calls to you.

2 boneless skinless chicken breasts
3-4 red scallions
1/2 lb tiny purple potatoes, quartered
6 cups chicken broth
1 Romanesco broccoli, chopped into florets
1 bunch asparagus, trimmed and sliced into coins
1 bunch dinosaur kale, chopped roughly
1 red bell pepper, diced
1 cup frozen peas
1 cup frozen corn
2 cups milk or more chicken broth
1 handful basil leaves, sliced thinly

1. Preheat oven to 350. Line a casserole dish with foil. Add chicken breasts, season with salt/pepper/whatever else you like, cover with foil, and bake until cooked through, around 30 minutes.

2. Slice red scallion bulbs into coins. Slice green parts thinly and set aside.

3. Saute scallion bulbs in a little butter or olive oil until tender, 1-2 minutes.

4. Add potato pieces and 6 cups chicken broth. Bring to a boil and immediately turn down to a low simmer. Simmer until potatoes are tender, 15-20 minutes.

5. Add broccoli, asparagus, kale, and red bell pepper. Simmer another 1-2 minutes or until kale is cooked down a bit.

6. Add frozen peas and corn and 2 cups milk. Chop cooked chicken and add to soup. Simmer until heated through, a few more minutes.

7. Top with basil leaves and tender green parts of the red scallions. Serve with fresh bread.

Tuesday, February 16, 2010

Peanut Butter Cupcakes


Just in case you were wondering what kind of cupcakes were lurking under those ladybugs...

Topped with whipped cream, a smear of nutella, or nutella whipped cream, these peanut butter cupcakes were pretty fantastic.


And even though cupcakes aren't really my favorite dessert, they're so much better when you can bite off ladybug heads while you're at it.


Peanut Butter Cupcakes

Adapted from I Heart Cuppycakes

I used crunchy peanut butter instead of creamy. While Cori objected to the chunky texture, Cary and I thought they were just fine.

  • 1 cup all purpose flour
  • 1 teaspoon baking powder
  • 1/4 teaspoon salt
  • 6 tablespoons unsalted butter, softened
  • 3/4 cup peanut butter
  • 1 cup brown sugar
  • 1 egg
  • 1 teaspoon vanilla extract
  • 1/2 cup milk


1. Preheat oven to 350. Line a 12-muffin pan with cupcake liners, if you so choose.

2. Beat the butter, peanut butter, and brown sugar until smoothly blended, about 1 minute by machine or longer by hand.

3. Mix in the egg and the vanilla, beating well.

4. In a separate bowl, stir together the flour, baking powder and salt.

5. Mix the flour mixture and the milk alternately into the butter/sugar mixture, starting and ending with the flour mixture.

6. Divide batter between the cupcake liners. Bake until a toothpick inserted into the center of a cupcake comes out clean, about 20-25 minutes. Cool cupcakes in the pan on a wire rack for 10 minutes.

7. Remove cupcakes from pan and top with your choice of frosting. Whipped cream (heavy cream whipped with a hand mixer or in an immersion blender with a little powdered sugar and vanilla), a dollop of nutella, or some nutella mixed into the whipped cream all make great, low-fuss options.

Monday, February 15, 2010

Edible Chocolate Decorations


Cupcakes aren't my favorite dessert, but they are pretty cute when topped with edible chocolate ladybugs. Here's how to make them, or chocolate ponies, dinosaurs, unicorns, soccer balls or whatever suits your fancy.

(Method from The Whimsical Bakehouse Cookbook, with further inspiration from the butterfly cupcakes at Annie's Eats.)


Step 1: Find a template. If you’re artistically inclined, you can certainly draw your own, but if you need a little help, try using a Google image search. I searched for “cartoon ladybugs” to find the image I used.


Step 2: Line a baking sheet with wax paper. Slip the template under the wax paper.


Step 3: Melt semi-sweet chocolate chips (see Tips, below, for more details). Scoop the melted chocolate into a pastry bag fitted with a small tip. For easier cleanup, you can also scoop it into a small plastic bag and snip off one corner for piping.


Step 4: Trace the outline of the ladybug in chocolate. Fill in any areas that will ultimately be black or dark brown. For these, I also filled in the ladybug’s spots, head, legs, and antennae.


Step 5: Carefully slide the template under the wax paper to another empty spot. Continue piping outlines until you have enough chocolate critters.


Step 6: Melt white chocolate pieces and add gel color until you get the hue you want (see Tips). Be careful – gel colors can stain clothes, surfaces, and hands, so try to clean up any spills right away. Scoop the colored white chocolate into another pastry bag or plastic bag for piping.


Step 7: Add the white chocolate over the semi-sweet to fill in the colored areas of each image, such as the red of the ladybug’s wings. Use a toothpick to help the color reach the outlines. Because you’ll be flipping the image over once it sets, don’t worry if you cover the spots or other black sections – in fact, extra chocolate will give the image added stability once it has set.


Step 8: Stick the entire baking sheet in the freezer or refrigerator for at least 30 minutes. Bake your favorite cupcakes, let them cool, and frost them.


Step 9: Carefully remove your chocolate decorations from the wax paper by cutting around each image with scissors, then inverting the paper and slowly peeling the paper off the chocolate. This results in less breakage than attempting to remove each decoration from the large sheet of wax paper. Place a decoration atop each frosted cupcake, and enjoy!


Tips:

• Try to choose templates that don’t have thin appendages. Legs, tails and antennae break off easily unless you make them extra thick or are very careful when peeling off the wax paper.

• Make a few extra chocolate critters, in case of breakage.

• For a gorgeous cake topping, make a full-sized chocolate decoration, or place tons of smaller ones on the top and sides of the cake.

• Remember that the decorations will be inverted after they set. This means that they will still look great, even if they look amateurish when they go into the freezer.

• It also means that any writing must be done backwards on the wax paper.


• A quick and easy way to melt chocolate is to place chips or pieces in a heatproof bowl and microwave on high heat. Stop and stir every 30 seconds to keep chocolate from burning.

• White chocolate chips don’t melt smoothly, since the ingredient that keeps them in chip form also resists intentional melting – buy a bar of good-quality white chocolate and chop it up instead.

• When melting chocolate, be sure that you use a completely dry bowl and stir with a dry spoon. Wet surfaces will make the chocolate "seize" and turn grainy instead of melting smoothly.

• I used about 3 oz chocolate chips and 1½ oz white chocolate pieces for 8 ladybugs and 8 letters.

• Use icing or gel colors instead of liquid food coloring so that you don’t change the consistency of the chocolate. Gel colors also work wonderfully for coloring frosting.

• Wilton makes a fantastic brand of icing colors that only require a tiny amount to color a bowl of white chocolate. Dip a toothpick into the jar and run it through the melted white chocolate. Stir, then add more color if necessary.

Originally published in the Los Altos Town Crier.

Monday, February 8, 2010

Moroccan-Spiced Lamb Shanks


Valentine’s Day is pretty much a food-centric holiday. From candy hearts to candlelit dinners for two, it seems that wooing your honey with, well, honey – or other tasty ingredients – is a requisite part of the day.

Unfortunately, all too often eating out on Valentine’s Day means fighting every other happy couple in the vicinity for seats at your favorite restaurant, not to mention having to order off a more expensive prix fixe menu.

This year, light some candles, play some soft music, and stay in for dinner. Nothing says “I love you” like a home-cooked meal.

These Moroccan-spiced braised lamb shanks are the perfect Valentine’s Day dinner. Once the initial prep is done, the lamb braises slowly for three hours, relaxing in a delicately-spiced broth. Two hours later, toss in some butternut squash and pearl onions, and let cook for another hour.

Braising is a method beloved precisely for its hands-off approach. While the oven is working its magic, feel free to work your own – clean the house, get ready for the evening, or go for a long romantic walk with your love.


Additionally, low and slow cooking brings out the flavor in tougher, less expensive cuts of meat, which means you don’t have to splurge for the fussier rack of lamb.

Serve the lamb over Israeli couscous or brown rice, or – even easier – just pop a loaf of store-bought, foil-wrapped bread into the oven when the lamb comes out and warm for 5-10 minutes.

Don’t like butternut squash? Garbanzo beans or sweet potatoes would also pair well with the Moroccan spices, or leave out the accompaniments entirely and just focus on the lamb.

Spoon everything into one big bowl and grab two forks. Pull up a chair next to your sweetheart, open a nice bottle of wine or champagne, and enjoy the evening together.

You can always go out the following evening if you miss the restaurant ambience, but you definitely won’t miss the crowds.


These braised lamb shanks get more tender with time – just like your relationship.


Moroccan-spiced braised lamb shanks
Recipe by me, loosely inspired by this recipe and this one.
  • ½ teaspoon cinnamon
  • ½ teaspoon cumin
  • ¼ teaspoon cardamom
  • ¼ teaspoon coriander
  • ¼ teaspoon turmeric
  • ¼ teaspoon chipotle powder
  • A few grinds of black pepper
  • 2 lamb shanks
  • 1 yellow onion, peeled and halved
  • 3 cups vegetable broth
  • 1 cinnamon stick
  • 1 small butternut squash, peeled, seeded and cubed
  • ¼ cup pearl onions, peeled
  • ¼ cup heavy cream
  • 1 teaspoon orange zest
  • 3 teaspoons chopped cilantro

1. Preheat the oven to 350 degrees.

2. Combine first seven ingredients in a small bowl. Rub mixture over lamb shanks. Heat one teaspoon oil in a large skillet. Brown the lamb shanks well on each side.

3. Add the lamb shanks to a large Dutch oven or oven-safe pot. Add the yellow onion halves, vegetable broth, and cinnamon stick, plus any leftover spice rub. Cover the pot and place in the oven.

4. After 2 hours of braising, add the cubed butternut squash and the pearl onions. Skim any oil from the surface of the liquid. Place the pot back into the oven, uncovered, for another hour.

5. After three hours total, remove the pot from the oven. Using tongs, place the lamb shanks, pearl onions, and half the butternut squash on a large platter. Cover with foil. Discard the yellow onion halves and the cinnamon stick. Let remaining liquid and squash sit until fat has separated out, about 10 minutes. Skim fat off the top. Heat remaining juices and squash over low heat. Stir in the cream and taste, adding salt if necessary. Puree the sauce with an immersion blender or in a stand blender to desired level of creaminess.

6. Place lamb and vegetables on a plate or in a large bowl. Add sauce, orange zest and cilantro. Grab two forks and enjoy with the one you love.

Makes two generous servings.

Note: Recipe is easily doubled or tripled for less intimate dinners.

Originally published in the Los Altos Town Crier.

Wednesday, February 3, 2010

Honey Whole Wheat Bread, 5 Minutes a Day Style


Some people are pasta people, or rice people, or potatoes people.

We're bread people.

We think a good loaf of bread goes well with just about everything, from creamy cheeses to hearty stews to ratatouille.


So up until about 6 months ago, we made bread in a bread maker. When we were lazy or had forgotten to start the machine in time, we bought a $4 loaf of Acme or La Brea bread at the grocery store.

Then, Cary found this article. Titled "Five Minutes a Day for Fresh Baked Bread," it explains that you can make a large quantity high-moisture bread dough and leave it in the fridge for a week or two, just baking what you need when you need it.


Homemade bread. No kneading. No proofing. No second rise. Already in the fridge, ready to go at a moment's notice.

It sounded too good to be true. Years before, we had started making cookie dough this way, only baking a few cookies at a time to have fresh cookies almost every night. (Try it. It's awesome.)

But bread dough? No way - making bread is all about dealing with finicky timed processes and dedicating a whole day of precise measurements and actions to something that's going to be devoured in about five minutes, right?

Nope.


This bread method really works. It's fantastically easy to make, incredibly simple to adjust to your own personal tastes, and results in amazingly delicious.

Jeff Hertzberg and Zoë François subtitled their book "The Discovery That Revolutionizes Home Baking." It might sound like a bunch of hype, but it's really true. Being able to pull a freshly-baked, gorgeous loaf of bread out of the oven about 30 minutes after coming home while everyone in your house bathes in the mouthwatering aroma - sounds pretty revolutionary to me, anyway.


Sure, a side-by-side comparison with artisan bread made the non-cheater's method (as I like to call it) might not end up favoring this simpler method.

But none of our dinner guests have complained yet. They're too busy eating the bread.


Honey Whole Wheat Bread
Adapted from Artisan Bread in Five Minutes a Day

The Master boule recipe in the book is fantastic, but we decided that eating a loaf of white bread every day wasn't the healthiest idea. I generally use whatever mix of white, wheat, and rye flours seem to make sense/I have on hand, making sure it totals 6 1/2 cups, and it's always turned out great.

  • 3 cups warm water (around 100 degrees F)
  • 1 1/2 tablespoons active dry yeast
  • 1 1/2 tablespoons Kosher salt
  • 2 cups all-purpose flour
  • 3 1/2 cups whole wheat flour
  • 1 cup rye flour
  • 1-2 tablespoons honey, depending on personal preference
1. Heat the water to about 100 degrees. Better to err on the side of colder water than hotter - cold water will just slow the rising process down, but overly hot water can kill the yeast. If you can't hold your finger in the water for more than 10 seconds without saying "ouch," it's too hot. Let it cool off for a few minutes, or mix in some cold water to cool it down.

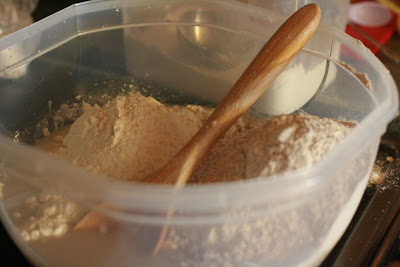
2. In a large bowl or tupperware (I use an 8-quart tupperware I found at Target), mix the water with the yeast. Just stir it together, no need to let it proof.

3. Stir in the Kosher salt.

4. Stir in the flour and the honey.

5. Let it rise for at least 2 hours at room temperature. It can sit out for up to 5 hours at room temperature. Bake whatever you're going to eat that day, then stick the rest in the fridge for up to a week (Hertzberg and François say two weeks is fine - I haven't tested it yet, since the dough generally doesn't last that long in our house).


When you're ready to bake:

6. Preheat your oven and your pan to 425.

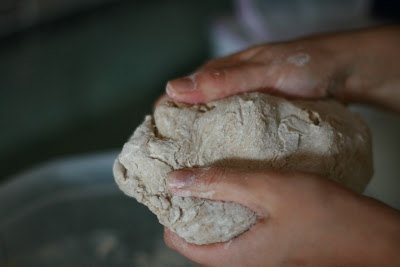
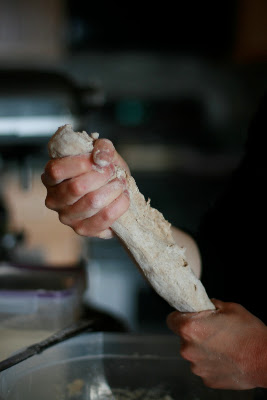
7. Form your loaf. Grab a hunk of dough and "cloak" it by sprinkling flour on top and pulling the floury top part around the sides of the dough to the bottom. Turn the dough ball a quarter turn and do it again, so that you eventually end up with a smooth, slightly floury dough sphere with a bunch of ragged ends at the bottom.


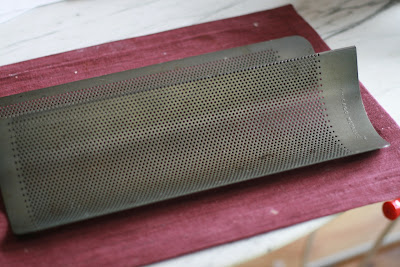
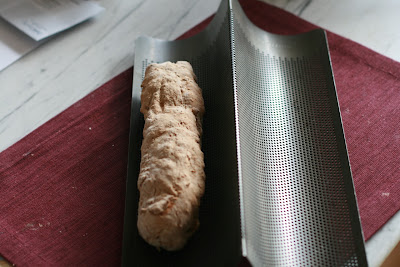
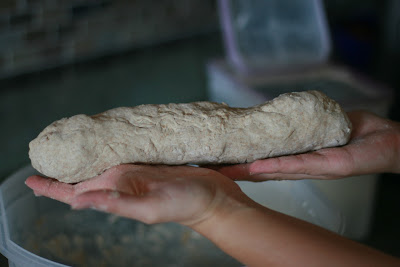
8. If you're making a round loaf, you can just plop the dough ball on your preheated baking sheet or into a preheated Dutch oven or cast-iron frying pan. If you want a long baguette-style loaf, squeeze the dough ball into a long shape, like you're making a snake out of play-doh. Set it on your preheated perforated bread pan.


Flour and slash the top of the loaf if you want - I generally don't and it always looks gorgeous anyway.


9. Bake until the crust is golden brown and the loaf sounds hollow if you tap on it. I generally set my timer for 25 minutes and start checking on it every few minutes after that - the size of the loaf will affect the baking time, so just keep an eye on it till it looks done.

10. Hertzberg and François say to let it cool before eating it. We are not convinced this is humanly possible, so we eat it as soon as it cools down enough to stick in our mouths.


This bread is great fresh or toasted for sandwiches the next day. We freeze extra loaves and pull them out and toast them.

We love the way the crust turns out using our perforated bread pan, but Dutch ovens and baking sheets work too. If you try this recipe with a baking sheet and love the flavor but wish it were crustier, consider investing in a bread pan. It also works deliciously as pizza dough or naan - just stretch it out thin and either bake it with cheese and toppings or brown it in butter in a cast-iron frying pan.

For more five-minute ideas, check out artisanbreadinfive.com.

Monday, February 1, 2010